Follow My Three Ring Circus

Home About Safety Facebook Youtube Tumblr Bloglovin
Showing posts with label Performance. Show all posts

Tuesday, June 3, 2014

The One That's Still Good

Remember when you dropped the last chip on the ground and you picked it up, inspected it for dirt and then popped it in your mouth? You know that brief exposure to the elements didn’t negate the delicious of the chip or its suitability as a snack. The 10 second rule saved us once again from wasting what is still good.
The moral of the 10 second rule has been important this month since I am simultaneously working on more aerial pieces than ever before including 2 duets, 1 silks burlesque piece and an audition number. I also noticed several of my fellow aerialists are struggling to keep up with show cases, competition applications and their own performance ambitions. While we are all trying to juggle these competing requirements without losing our minds the ethics of recycling material were discussed on more than one occasion.
The knee jerk reaction is to create something new, wonderful and stunning for each show. I have to admit that when I first considered revisiting material it felt like a cheat but then I realized I should be applying the 10 second rule to more than just my food. I had worked on a silks piece for 3 months and only performed it once for a very select audience…it was still good. Of course there were changes in musical selection and a move to tailor the dance for a new audience but in the end this will allowed my best efforts to go further. Rather than scrambling to have something completely different for every show I want to give the audience a polished performance from my library that has been custom fit for them.  

This approach won’t work for every performance but it does give me some breathing room. I feel free to develop new material at my own pace knowing I can call on acts that I did not discard after one show.

So I guess what I am trying to say is scoop your performance chips off the floor and savor the crap out of them.

Do you ever feel pressure when creating new material? Do you sample your greatest hits? Leave me a comment below.

Sunday, February 9, 2014

The One About Simplicity

Recently I have enrolled in an aerial variations class which has lead me to think about exploring the known and what benefits it might hold for your practice.

Jennifer Cody's students showing 6 variations on a single move
I have found it takes a lot of guts to spend time developing around moves or skills your might have learned in the first few months of practice. For me there is fear of not including enough fancy moves in my own routines. Conversely, many people who I look up to in the hoop and aerial community have an emphasis on mastering and expanding on what are often thought of as basics. Some of my favorite performances don't involve lots of tricks but about the quality of core skills and inventiveness around known moves. It is legitimately more exiting for me to not know what will happen next rather than just see a difficult trick.

I have decide to try and be more mindful of whether I am filling my work with flash or innovation. To that end I have been working on a standing challenge we have in the variants class to develop a whole routine around a single base move. It's significantly slower for me than just stringing together tricks but I think the final product will have a more organic feeling in the movements. 


A Simple Manta To Remember
  When first joining a skilled community there is a desire to be included. Like any good student you practice the basics to become accepted by your peers. 

You spend time building a vocabulary. 
Photo By Nikki Arnold

You discuss technique
Hoop Path Point Technique
Photo by Hannah Havok
But don't forget your first words.

Remember simple can be beautiful

Photo by Hannah Havok

Simple is complex
HoopPath style Balance
Photo by Hannah Havok
This is what I have been thinking about for the last couple of weeks. What has been your inner mantra during practice?

Saturday, December 28, 2013

The One About Planning Choreography

Much of my first foray into circus was spent primarily with what is considered flow arts. Hooping, poi, juggling, fans and devil sticks all fall into this category. They are called flow because innovation through free manipulation of the tools is encouraged. I enjoy this area of practice because you are encourage to try new things even if you are not sure of the outcome because the penalty for failure is low. I find the surprises that were unplanned to be some of the most rewarding during any flow session.
Deep Ellum play time
Photo by Hannah Havok
When I decided to take up aerial arts there was a completely different mind set because you must carefully consider each move before execution to ensure your own safety. Even if you are not sure if you can accomplish a trick you still need an exit strategy. In order to perform publicly you need to be able to plan at least some rudimentary choreography you can call on in the air.

At first I was completely overwhelmed at the idea of needing routines and structuring them from scratch. Here are some steps I have found that help me organize my thoughts when planning choreography.
MTPS 2013
Photo by Don Curry
Duration
This is probably one of the first things I consider when planning any routine. You want to consider how much stamina you have to perform the routine. Do not plan a routine that is so long your exhaust yourself and then leave your audience with an overwhelming feeling of “meh” because you can not finish strong. 

Music
Once you have determined the duration of your performance you can now select some accompaniment. This is probably the most fun part of the process but also tricky. Remember to consider each song as a whole. It might have a catchy hook that’s fun to sing along with in the car but will be  repetitive to the audience after the first refrain. What I usually look for in a song for performance is one that has several distinct moods within the song. Changes in instrumentation or tempo are usually good candidates that give you options for striking poses or switching between actions and styles. 

Pacing
Consider where you want to put your tricks. If you have some really tough inversions you might want to put them earlier in the performance when you have the most amount of stamina. Alternatively if you have a really large drop or something where you are going to lose height it might make sense to do those later in the routine. My suggestion is to pick a few key moves you think will compliment each other during the routine fill in the rest of the performance around them

MTPS 2013
Photo By Don Curry
Less is more
When you start to design your routine don’t get caught up in trying to add too many tricks. Often tricks take longer to execute than you would anticipate and adding content to a routine is far easier than trying to take out material later. Your movements from one pose to the next are as much a part of the routine as the tricks.  You never want to look like you are rushing to make it to your next position in time so give yourself some breathing room. Do not be afraid to hold poses or move slowly so the audience can see what you are doing and enjoy your actions. 

Flexibility
It is not only important to be flexible body but also in mind so be open to changes in your choreography. All of my routines have experienced a major change at some point during the rehearsal process and have been better for it. Once you have your first round of choreography take a look at the routine for anything that does not work. If something look awkward or wrong try experimenting with different tricks or order to your routine. Don’t ever get so attached to a trick that you are afraid to move it or lose it. 

Rehearsal at Lone Star Circus
Choreography is not something I previously had a lot of experience with but when you are going to perform it quickly become a necessity. There are probably more formal ways to approach this process but I thought I would share some techniques that have worked for me thus far. What techniques do you use when planning to put on a show?

Thursday, November 21, 2013

The One About Practice Vs Performance

In the last several months I spent a significant amount of time preparing for my first aerial performance. While I faced the normal challenges you might expect like picking choreography and music I found it was some seemingly simple tasks that I struggled with the most. Most notable of those simple tasks was moving with what I would consider performance worthy poise. 

What do I mean exactly?
Well, what makes people want to watch you?

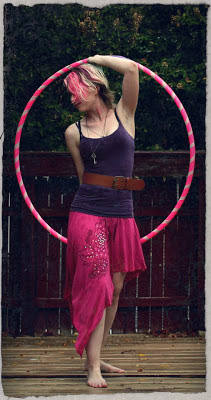
Miss Texas Pole Star 2013 Performance
Photo by Don Curry
I would see my instructor glide up the silk and be completely enthralled with how elegant they looked. When it was finally my turn to try I would scrabbling on the fabric for a bit and then eventually accomplish the thing. Not having any background in professional performance it seemed that getting ready for the stage should be as simple as acquiring the knowledge and strength to do tricks. However, I gamely attend class every week and ran through the same poses and exercises as my teachers and continued to notice something distinctly different between how they looked and how I looked. 
 Luckily, with the help of some mentors during my preparations I started learning other equally important skills to making a polished aerial performer that are not necessarily taught in the classroom. Most of these things were fairly basic and not directly linked to overall ability or skill but make a huge difference to how you practice and most importantly how you appear to an observer. 

If I only had to remember 3 words to make a routine performance worthy it would be
Intention, Extension & Tension.

Intention
One week our aerial hoop class was observed by a retired ballerina who now contracts with dance troupes to refine their routines. She had volunteered to give our class some pointers on performance. She sat quietly for the hour as we gave the lesson our best efforts. At the end of class we nervously clustered around to hear what she thought at which time she told us something that changed my practice from that day forward.

While she thought the discipline was amazing she found our efforts ultimately boring. It didn’t really have anything to do with our ability or skill but about our intention. We only worked with the end goal in mind when we should be considering every move we made. We should approach the apparatus like a partner with whom we coordinate all our actions. We should never rush through a mount or re-position just to get to a trick in practice. The audience is seeing everything leading up to your trick so just as much effort and concentration should be spent on getting there as perfecting your final position. 

Treat each moment like a performance in your mind. 

Extension

This goes hand in hand with intention. If you are thinking through all of your movements you should be thinking of what you are doing with your whole body from the tips of your fingers to the ends of your toes. So often we fail to celebrate movement and instead concentrate on points of strength or articulation and let the rest of our body be dragged along in its wake. We have learned to be prey amongst predators with eyes averted and limiting nonessential motion in our hands and feet. While this is a great strategy for avoiding predation by a T-rex it’s not very engaging for the audience. By allowing every movement to flow from the starting point out to your extremities you bring fluidity and grace to your performance.
One visualization that a lot of my instructors use time and again is imagining an extension of some sort that continuous beyond where you end.  There are different examples like strings or lights…you can even think of laser beams if it makes you happy. What is important is that you imagine traveling out along those lines as you preform because it brings animation to every part of your body from the top of your head to the bottoms of your feet and out through your hands. You should even extend your laser like focus to your eyes and use it to bring your awareness to the audience and let them know you are watching them. BECOME THE PREDATOR! (okay that got weird but hopefully it helped)
Where your gaze falls or the angle of your fingers can change the audience's preception
Tension
If you have done the first two steps you should be well on your way to achieving and maintaining tension but it is something worthy of its own consideration. One of my aerial trainers paid me the compliment that I was progressing well in my knowledge of aerials but I needed to remember to engage my whole body while on the silk if I ever wanted to perform. At first I was confused about what she meant because I felt like I was working my butt off every class.
Fortunately for me she had an exercise that immediately connects you with the feeling of engaging your entire body.  If you lay on the floor and bring yourself into a boat position where you are balanced on your bottom and someone poked your shoulders you should rock back and forth like a ship on the water. You are connecting your body so now you can move as a single unit.
If you ever feel like you are not working part of your body to stay in the air it is probably noticeable to the audience. When you are supporting yourself with your feet and you release tension from your arms it looks like you are just dangling instead of dramatically climbing.
Engaging your body has a huge immediately visible change but requires constant focus.
If you imagine the three words during every practice something as simple as raising your leg can go from a utilitarian action to a captivating performance. I am still working on this myself so I cannot claim to be an expert but I do know they have made a difference in preparing to share what I have learned with an audience.

These are just my suggestions so feel free to share your tips on getting ready for the stage.

What makes the biggest difference in your training?

Tuesday, November 5, 2013

The One With The Triumphant Return

I know I have been remiss in my blogging duties over the last several months and I hope to remedy that soon. While this does not excuse my absence I can offer you an explanation for my disappearance. In May I was approached about an aerial competition being held in Texas and encouraged to apply. Since I am the type of person who is driven by tangible goals I decided to enter the amateur silks division and general lyra division (since there is no amateur division for lyra). With 5 months of silks and 3 months of lyra under my belt I knew I was going to have to buckle down to create an application. I dedicated most of my energies to choreographing and refining a routines on both apparatus for submission in July.

Training is mostly unglamorous views from the apparatus
The process was a very private affair aside from the people who I trained with. I remember reading once that the best way to not accomplish something is to tell people about it. Telling people about what you are going to do triggers the same reward centers in your brain as doing. If I started talking to people about my new goals that might feel good enough and I would never accomplish the task. An equally compelling reason to keep my aspirations to myself was the very real possibility that I might apply and not be selected as a finalist despite my best efforts. Either way I was afraid to tell anyone about what I was working on other than in passing mentions as to where I was spending my time or why I was unavailable.
 
To my surprise I did make it into the 8 finalists in the amateur silks division which became a whole new focus starting in July. A fresh routine had to be choreographed and I needed to be stage ready by October. Being able to stay in the air and perform a three minute routine with some degree of control was my baseline for the application piece but for the competition I needed not only control but some degree of grace and musicality. I learned a lot in only a few months about moving with intent and the difference between DOING and PERFORMING a routine. While the competition aspect of this whole experience was not compelling for me the notion of performance and the difference between a student of an art form and a performer has changed how I approach the silks or any apparatus.

Photos from Miss Texas Pole Star 2013 performance
Without making one monstrous post about everything that has happened along the way I was thinking about breaking this into a series of blogs about the experience and what might have been nice to know along the way as a fledgling aerialist. This time though I promise not to leave you hanging as long between posts *pun intended*


Tuesday, May 28, 2013

The One Where We Compare Lyra Vs Silks

This year I wanted to take my current set of skills and boldly go where I never had before.  Expanding my horizon for hooping meant investigating the lyra. Naturally I assumed if I liked that hoop on the ground then it should be even better in the air.
 
I set out to find an instructor and settled on a gym for my first class. They offered lots of classes in aerial arts and I was faced with a choice between lyra or aerial silks. As it turned out I wanted to start right away and silks was the only class with room for me to enroll. I initially planned to try both disciplines but as it became woefully self-evident that I had a lot of work to do on silks I was more intimidated by the idea of trying the aerial hoop. I saw silks as a series of knots and slings that helped me stay in the air and the lyra as a cold steal hoop that would require me to do more artistic versions of pull ups the whole time.

That is when I started scouring the internet for comparisons of the two art forms. Unfortunately, while many people do practice both skills I could find surprisingly little written about it for the inquisitive. Finally, I just decided to screw my courage to the sticking place and try a lyra class  and write a blog for those who might be curious about either disciplineI am now about 4 months into my aerial silks study and 2 months on the lyra and let me say I am so glad I chose to try both. They are a vastly rewarding and beautiful art forms but aside from being in the air they have very little in common. If you are considering trying to decide between starting on either of these apparatuses I hope this will be a helpful post.
One thing I hear over and over about the lyra is that people feel like it is easier than silks. This is true to the extent that if you have the basic core strength to support yourself learning the pathways to tricks is much easier on lyra. Fundamentally it is just a large steal ring and as long as you can hang on all the tricks are just different orientations of the body in relation to the hoop. Silks tricks are often a long series of precise wraps that can be difficult to remember when you are beginning. Forgetting something as simple as putting the silk under an arm can leave you a tangled aerial marionette.
Where I disagree with the opinion of the lyra being easier is if you have not built up your core strength yet. I am not talking about being able to do a billion reps of pull ups but if you cannot support your body weight in a hanging position then it is going to be difficult to even get into the hoop. In the beginning aerial silks will give you a slight advantaged because you can essentially tie into the silks from ground level and start working on trick pathways. In my opinion you will probably feel like you have accomplished showier tricks in the first few weeks of silks as you are working on your core strength.  I started aerial hoop after several months of silks so I spent most of my time developing pathways to tricks but I see many beginners struggle to get into a seated position. There are some things you can do to squirm your way into hoop but your progress on lyra is going to be mostly conditioning until you have the ability to maintain your body weight in the air.
Since there is not much to the lyra aside from you and the hoop it is usually considered more dangerous than silks. Let me very clear here when I say “more dangerous”. Both disciplines are inherently dangerous and should be treated with respect and caution but lyra does not have any supporting fabric that can be used to create locks. Now locks can fail and you can perform a wrap improperly with silks but the support provided is far more than in a lyra where you either have some kind of grip on the hoop or you do not and pure balance is the key for a number of tricks. There is definitely instruction that goes into learning where the sweet spot of a trick is but if you screw up then there are a lot fewer opportunities to stop yourself from taking a tumble.

 That brings us to probably the biggest difference between the two disciplines and that is the pain factor. Both silks and lyra will tweak, pinch and squeeze you in uncomfortable places but I never bruised myself on silks as frequently as I do on lyra. The first weeks on lyra left the backs of my knees a mess of unattractive colors ranging from yellow to deep purple. As my skills have progressed and I found that the bruising can be less but it never seems to completely go away. It is safe to assume that while you may acclimate and find better ways to approach the hoop it will not change the fact that you are resting all of weight on a 1 inch diameter steal hoop. Any place where you are supporting yourself is going to be subject to bruising and is going to be a bit uncomfortable. You will just have to keep in mind the old adage…
Please keep in mind both lyra and aerial silks require vast amounts of skill, flexibility and strength at the higher levels of performance. This comparison is meant for those interested in what these disciplines might be like for someone starting at a beginner level. Hopefully, this will encourage you to expand your own horizons. If you have any additional questions about either apparatus I would be happy to answer them or feel free to leave your own opinion on why you chose lyra, silks or both.

Thursday, April 4, 2013

The One On The Flying Trapeze

Last week I found myself standing on the Santa Monica Pier in LA staring up at people flying through the air 30 feet above the boardwalk. Upon spying the trapeze one of my friends jokingly suggested that is what I should be doing on my vacation. After a few slack jawed moments of sheer wonder and excitement I got my wits about me enough to locate the office and sign up for my first class in flying trapeze.
Trapeze School New York has several facilities across the country, Santa Monica Pier being their newest, which specialize in flying trapeze. Their trapeze class is taught as a 2 hour session in groups of 10 students or less. The classes are priced between $50-60 a lesson which is a bit expensive but in a discipline where safety and equipment is a priority you may need to be prepared to pay a little more to ensure the quality of your instructor and the maintenance of the equipment.


I arrived the next morning bright eyed and bushy tailed for my first class. I had been advised the day before on best choices for clothing which was the usual leggings and tank top. Lucky for me I was traveling with silks attire in anticipation of attending a work shop at a local circus school later in the week. I was surprised that they did not recommend leg warmers which are usually quite useful for apparatus where there are hoops or bars. In retrospect compared to lyra or static trapeze my shins and calves did not come into much contact with the bar. Leg warmers would have done little to protect the back of my knees and that is where I took a majority of the strain from the class.
After I quickly signed a waiver they took me and all the other first time flyers to receive a quick briefing on what to expect on the platform and what we would be trying to accomplish as we hurtled through the air. We were taught how to stand on the platform, prepare and when the order was given to jump. The instructor also covered the first trick we would be attempting to learn. We would be jumping from the platform and attempting to negotiate a basic knee hang and if we were lucky a catch at the end of class.


We were also fitted with nylon waist belt cinched down as tight as humanly possible. These belts represented our link to safety. If you are going up the ladder to the platform you are clipped to a safety pulley, once on the platform you transfer to another safety clip, and when it comes time to jump yet another series of clips are attached to your belt so they can control your descent should you lose your grip on the trapeze. At this point they also informed us that in order to reach the trapeze bar we would need to lean out over the platform and trust all of our weight to the assistant on the platform who would be holding us by the back of our belts.


After we had practiced all of the actions as much as possible from the ground it was now time to get in the air. My time with silks has definitely brought me more comfort with being in the air but had not completely prepared me for my first climb and jump from the platform. The trapeze rig is tall…very tall. As I made my first assent I looked out over the beach and tried not to think about how high I was going. As I transferred my safety clip to what had once appeared to be a generously sized platform and now seemed barely adequate for my and the instructor I could barely keep all the instructions in my head.

My first attempt was far from steller. When it came time for me to trust my instructor and lean out over the edge it was a struggle. I tucked my hips and did everything in my power to remain under my own control rather than relaxing into the correct position. Once the command to jump came I did not hesitate but then had a moment of complete terror where I was swinging out toward nothingness. I had this moment or realization that I had just jumped off a platform 30 feet in the air and had no way of getting back and nothing to save me except this puny little bar overhead and I was not even sure how I was going to get down. As I started to swing back I hear my instructor shouting “KNEES UP” which was the command to go into the knee hang.

The major difference between flying trapeze and all of the other disciplines I have been learning thus far is flying trapeze is all about timing. If you execute your actions during the right moment of each swing they are relatively effortless. I will not say there is no effort but in comparison to trying to lift your knees above your head on a static apparatus it is much easier provided you do it in the right moment. In the case of my first attempt I completely missed the right moment and was left struggling against gravity. Once I actually had my knees over the bar I was able to lean on my lyra experience and tried to bring my heels to my thighs and relax into a back arch.

The last part of my first swing was the dismount. My only experience with landing on something from the air has been the trampolines we use at the gym for conditioning. I was very hesitant about landing on the net because I was expecting it to be much firmer. It makes sense though that it is softer because a trampoline is trying to spring you back in the air vs the netting being there to slow and then stop you descent. You are also connected to guide wires that should you begin to fall improperly an instructor will manually slow your fall. With all of these things working for you I was pleasantly surprised that the dismount was not as bone jarring as expected.

After each attempt you will receive some coaching on what to work on during your next turn on the platform. Over the course of about 3-4 attempts depending on the number of students you will hopefully start to understand the trick and solidify your timing. If you are able to successfully complete your trick solo you will be allowed to attempt a catch. A catch means that you will have a partner on a trapeze across from you and you will attempt to make a transfer from hanging on your trapeze to your partner. Remember the trick is all about timing and in this case it is the timing for two.This time instead of being prompted from the ground you partner is giving you instructions and the success of your catch is based on executing those instructions without hesitation or error.

After 4 attempts on the platform with the solo trick some of the initial butterflies in my stomach had subsided and I was completing the knee hang reliably but I did not expect to make my first catch. On the platform I watched as my partner started his swing and waited for the command to ready and then jump. Once I left the platform I tried to forget about the impending catch because if I did everything properly it should come naturally. I completed my knee hang and when I came up from the third swing and looked out there was my partner ready to grab my hands. I immediately released the hanging grip I had on my own bar and found myself being suspended from another person high above the ground. Flying through the air I thought to myself "This was the stuff dreams are made of." I was practically giddy when moments later I landed on the net below.


After finishing the class I would highly recommend the experience to anyone who ever thought they might be interested in circus arts or had any passing fancy with the flying trapeze. The way they have structured the class and from what I saw of the other students I believe you can have a successful first lesson even if you have no prior experience with the aerial arts. If you are aerial experienced the flying is a fun departure from the static apparatuses most of us use. The Trapeze School New York was a pleasurable experience I hope to repeat on future visits to California or any other states where they have facilities. 
 

Monday, March 4, 2013

The One About Learning To Hoop

Hooping to discover
Since picking up the hoop a year ago I have been on a process of self-guided study. I have learned a lot about personal discipline and responsibility in this process. In life there are no formal class rooms so drifting from path to path is easy. You will meet many teachers but you are responsible to accept teaching from them. Just like the Kung-fu students of cinematic legend you must seek the masters of your discipline and understand their lessons.
Solitary practice can yield many results if you are diligent
Fortunately with modern technology you will not have to make an arduous trek up fog covered mountains to find your master…unless of course, you want to. Most hooping can begin through solitary learning with a quick search on the internet or youtube for tutorials. Watch lots of tutorials on waist hooping, core hooping, basic lifts. Try watching multiple tutorials for the same trick since it may take a couple different instructors to find the one who explains in a way that is just right for you. I am a big advocate for free youtube instruction because it is readily accessible and the content that exists for basic moves is fairly complete and will get you ready to engage in more complex discovery when meeting with other hoopers.  There is also a number or really great paid online tutorial series that offer more detailed content than the free tutorials. Paid tutorials often cover things that are talked about less directly in free tutorials like flowing and considering the performance aspect of your dance.
 Here are some of my favorite youtube instructors
Playtime with Hannah Havok and Mia Moore
When you begin to advance you may want to actively participate with other hoopers in informal settings. Group learning often help solidfy your skills when you share them with others. There is a lot to be gained from other peers who may be sharing some of the same frustrations as you. It is encouraging and helps you stay on your path when you meet other on the same journey as they may have wisdom to share about what is beyond the next turn in the road. Personally, I started a small private group with friends where we talk almost daily about our favorite tutorials, current frustrations and break throughs.
Here are some great communities you can explore as you start down your path
Learning about blindfold hooping at Ann Humphreys workshop
 As you travel you may reach what appears to be plateau or an insurmountable crevasse. Some of these may be momentary before you see the next logical route but sometimes you may not yet have the tools to continue on. In cases like these is may be necessary to try something completely new. This month was my one year hoop-iversary and I was happy to be marking it at my first instructor led hoop workshop with Ann Humphreys. I had reached a point with my hoop where I was working on improving my tricks each session but not making measurable progress. This was the first time I had focused instruction on technique and I will say that it fundamentally changed my approach to the hoop. Having a master level instructor helped me refine my actions and made many things I had previously failed at not only achievable but also repeatable. I left the workshop with some new tools that will hopefully allow me to continue growing as a hooper in ways I had not previously known about or even had the language to express. If you feel like you are ready to take the next step I suggest searching for a hooping retreat or workshop being led in your city.
Here are some popular hooping organizations that frequently schedule instructor led workshops
I feel like I have only just begun to brush the surface of how to enter the vibrant world that is the hooping community but I hope this will help some of you as you take your first spin.

Ann Humphreys' workshop

Tuesday, February 26, 2013

The One About Being Terrible At Something

Jake the Dog speaks the truth
Most, if not everything we do we once sucked at. Even the most basic skills like tying your shoes were once monumental tasks only performed by the most skilled people…aka your mom. Hopefully, through persistence and practice you at some point mastered tying your shoes and went on to tackle new and even more difficult tasks.

While it is easy to become discourage because we are comparing our fumbling attempts to polished routines performed under the big top it is important to remember the circus arts are no different from shoe laces. Each performance starts with simple skills building on one another and small victories.

When I started hooping I was constantly inundated with videos of the very best in the discipline spinning hoops at high speeds and constantly pushing the bounds of their tools. At 5 weeks of daily practice I was barely able to maintain the hoop at my waist. So often we feel like we need to immeditaly be masters at our craft when we should allow ourselves to be students first.
A skill means you had to learn how to do it
Here are the top 5 things I try to remember when working towards my goal

  1. Practice - You do not have to put restrictions on your practice just spend time each day making your passion a part of your life. That can be as simple as researching new moves, taping your hoop or just working for 5 minutes on stretches. Make your hobby a habit
  2. Give yourself permission to fail – If you are not failing you are not pushing your limits. Try for that hoop trick you saw on youtube or try that silk trick you could not quite complete last week. If you are only doing things you know you can do it will look great but you will not continue to grow in your discipline.
  3. Don’t measure yourself against others – Mentors and goals are a great part of any discipline but do not let comparison discourage you. The only person you should compare yourself against is the performer you were yesterday and the performer you are today.
  4. Circus hurts – This sounds kind of terrible but it is true. You are going to bruise, burn and bend yourself to discomfort but stick with it. Those pains will go away to be replaced by new ones but that means you are learning.  Practice within reason but do not be afraid to push your limits
  5. Love the process –Even if you are trying to learn a new and impressive trick do not let it own you. Celebrate successes…even the tiny ones. Even if you only held the handstand for a second or you had to help the hoop around with your hand it counts. You are learning and that means not doing it perfect every time. You did it once now you can do it better in the future. Enjoy your practice. Do not lose sight of why you are doing this. Have fun!
Safire created a great video on this topic. It has been an inspiration to me on my journey.

Love the Process!

Friday, February 22, 2013

The One With A Different Perspective

I think I have said it before but I really dislike exercise that feels like I am doing it for the sole purpose of fitness. Running on a treadmill or lifting weights does not engage my mind and I struggle to commit to the same routine every day. When I decided I wanted to take up silks and lyra because it seemed like the next logical progression from hula hooping I realized I was probably going to need to start some kind of fitness routine. After my first class I knew that I was completely in love with the feeling of being in the air but also that I was going to have a lot of work to do if I ever wanted to advance.  I was concerned that I would not be able to force myself to do the conditioning required because of my aforementioned aversion to exercise. Luckily for me there are some fun option I have learned that are engaging and can help target the areas that need to improve for different acrobatic skills.

No lie, I am a master couch potato
In order to climb, invert or do just about anything on the silk you are going to need upper body strength. You are constantly supporting yourself with your hands and arms as you lock your feet to position for another trick. Planks are a great way to build strength but ultimately kind of painful and frustrating. I totally feel like a boss when I complete a series of planks in class but unless the torture is instructor led, chances are I am not going to inflict it upon myself in my free time. This is why I have come to love the handstand. Handstands not only develop your arm and core strength but also engage your mind as you concentrate on keeping your feet in the air rather than thinking about how much your arms are hurting.


Sadly, not everyone has as much love for the handstand as I do. Most people I talk to are nervous of being upside down, losing their balance or do not even know where to begin. The handstand does not need to be some impossible acrobatic feet if we break it down into simple parts, slowly increase our skill level and reward ourselves for small victories along the way. When learning the handstand there are several approaches depending on your comfort level. I am going to cover the 2 most common I have used.


Wall is your friend!
Before we start getting inverted lets get aquainted with some tools we have to help.This is Wall. For those of us who have not spent much time looking at the world upside-down Wall is a friend as we find our balance. Wall is a great spotter who will never let you down and doesn’t care how hard you kick him in the face.
Some of us are a little uncomfortable with hurling ourselves at the ground or do not have confidence in our ability to support our fully body weight on just our hands. In cases like this a progressive approach might be a good option. Personally I feel like this process takes more strength but there are also more exist points before becoming inverted should you lose confidence at any point.

It helps if you sing about Spiderman while you do this
1. Start by facing away and with your heels against the wall. From this position bend over and place your hands on the ground. You will now transition your weight into your hands and while supporting yourself start walking your feet up the wall. You will probably reach a position where your body the wall and the floor are creating a triangle.


2. Now for, in my opinion, the hardest part. Start walking your hands back towards the wall. As your hands get closer to the wall you should be able to walk your feet up. Personally I find it very difficult to get to a completely vertical position using this process and I dislike not having the wall at my back when trying to find my balance.
Remember to breath
Now that you are feeling more confident you can practice kicking up directly into a hand stand.

1. Facing the wall place your hands on the ground about 6 inches from the base. From this position you should look like an inverted V with your hands and feet on the floor

2. Keeping your arms straight kick your feet up and against the wall. When you first start do not worry about making it pretty. Smash your feet into the wall, bend your knees or whatever you need to do to get up there. Once you do hold that position and appreciate your accomplishment

3. Straighten your legs and point your toes. Now most importanly tighten your core, legs and butt while pushing through your hands. Handstand doen't just come from your ability to pile all the weight of your  body on your arms. The more support you supply from your abs the more controlled your handstand will be

4. Slowly with one foot push away from the wall. Tentitively find your balance and then push the other foot off to. If you have to let your feet drop or lean back against the wall that is okay.

5. Once you feel comfortable try going into a handstand in one fluid motion from a standing postition and not touching the wall before finding your balance.

Remember handstands require you to support from the arms and core. Both are neccessary to maintain control. Your balance will come with practice and time. Even if you are only able to hold an unsupported handstand for just a second  it still counts as a win. Celebrate all your milestones and love the process.